
Wired Network Connectivity for Windows
To see a video guide instead click here.
Be sure you have connected your computer to the network port with an Ethernet cable before you begin the steps below.
1. From the Start screen, click "Run" (Win+R) and start typing "services.msc".
"Services" should open immediately.

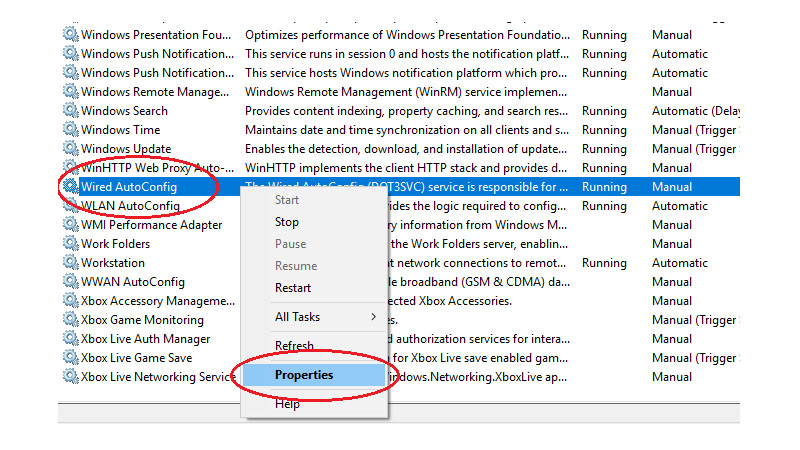
2. Scroll down to "Wired AutoConfig" from the list, right-click, and choose "Properties".
The Wired AutoConfig" Properties dialog box opens.
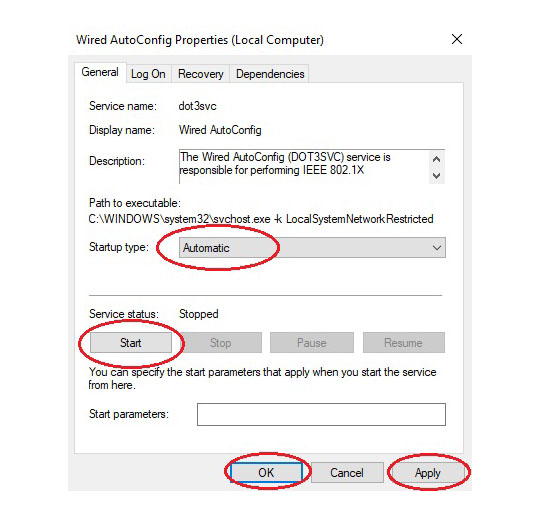
3. From the "Wired AutoConfg" properties dialog box...
Click Automatic from the "Startup type" "
Click Start ► Apply ► OK.
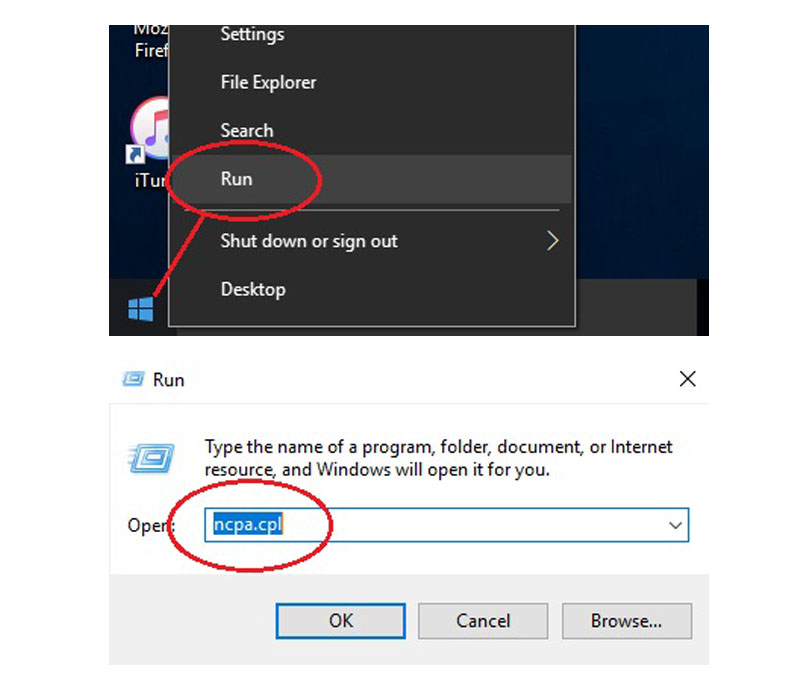
4. From the Start screen, click "Run" (Win+R) and start typing "ncpa.cpl"
"Network Connections" dialog box opens.
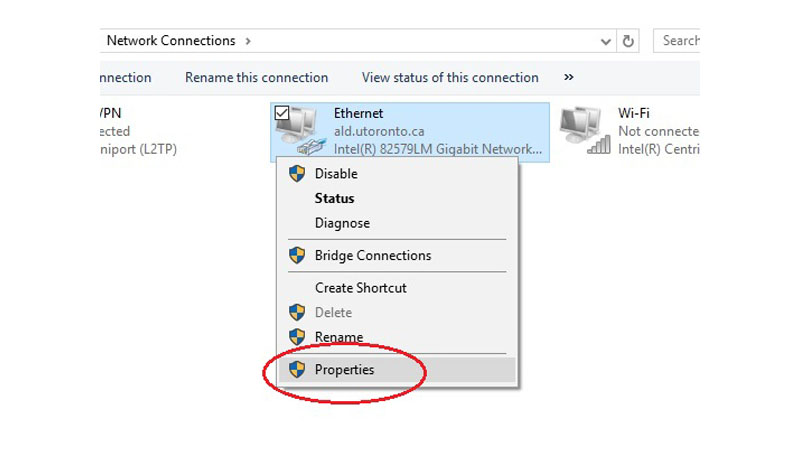
5. Right click the "Ethernet" icon and choose "Properties".
The "Ethernet Properties" dialog box opens.
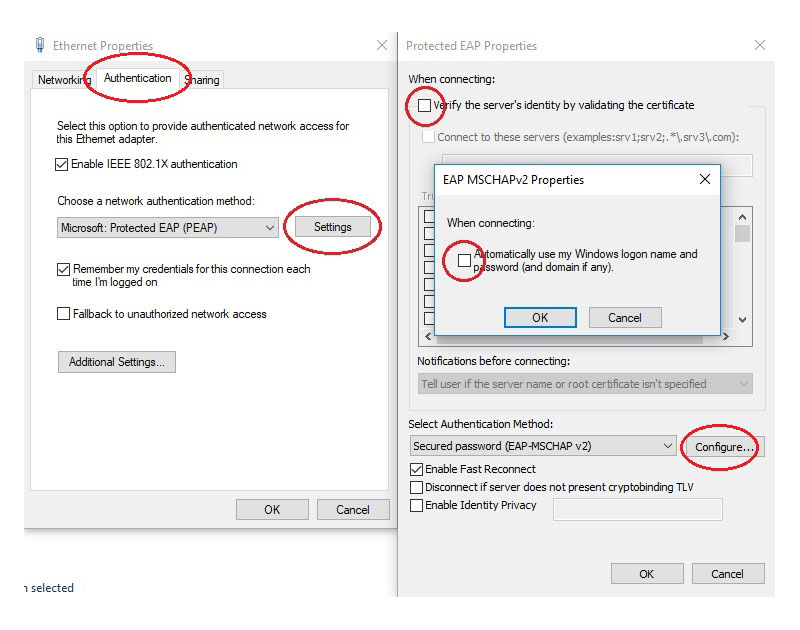
6. Click the Authentication ► Settings.
Protected EAP Properties dialog box opens.
a). Make sure that the "Verify the server's identity by validating the certificate" checkbox is Unchecked.
b). Click the "Configure" and make sure that the "Automatically use my Windows logon name and password" checkbox is Unchecked.
Click OK and close the Protected EAP Properties.
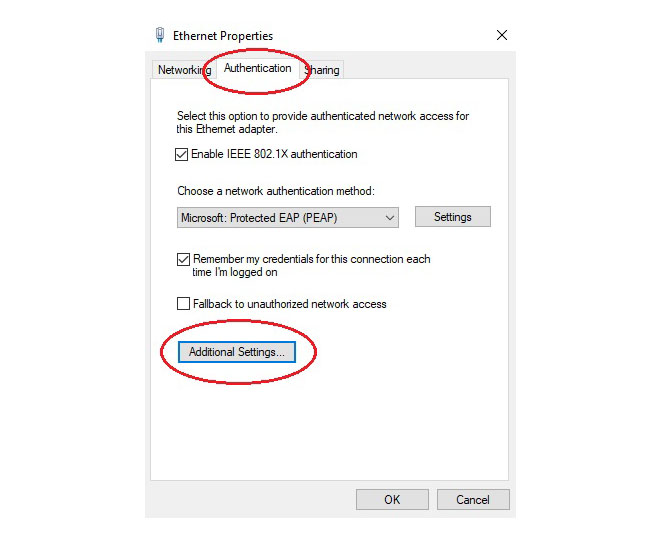
7. From the "Authentication" click "Additional Settings".
The "Advanced Settings" dialog box opens.
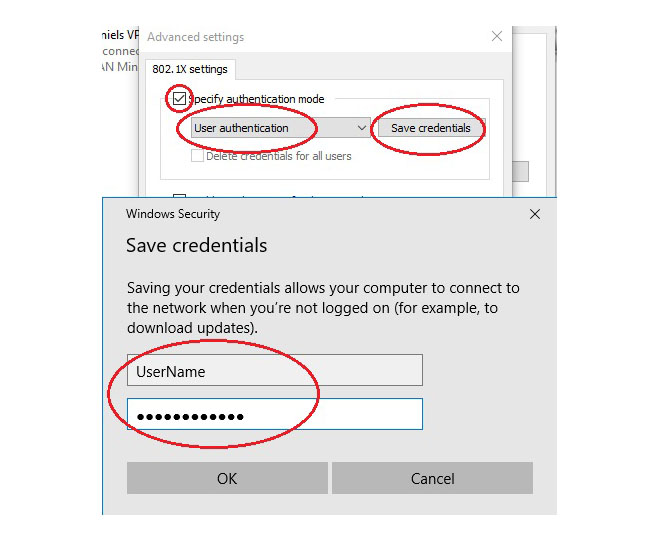
8. From the "Advanced Settings" window, check the box next to "Specify authentication mode"
From the drop-down box directly beneath, choose
"User authentication" ► "Save Credentials"
A login screen prompt will appear. Enter your Daniels Username and Password.
Click Ok and close the Network connection window and the Sharing Center window.